MR SHIH

必幸施

Binary search與Obj-C

| Comments

Binary search概念

Binary search概念其實很簡單,recursive版本實際寫起來很像Quick sort in-place版本前面divide的味道。每次的遞迴都把排序後的數列對切一半然後去其中一半來繼續處理,詳細可以看Wiki的介紹。

Binary search概念轉換成Code

1
2
3
4
5
6
7
8
9
10
11
12
13
14
15
16
17
18
19
20
21
/**
 * @return Retrun index of number in array.
 * If number not found in array return false.
 */
- (NSNumber *)binarySearchIndexInArray:(NSArray <NSNumber *>*)array forNumber:(NSNumber *)number leftRange:(NSInteger)left rightRange:(NSInteger)right {
    
    if (left > right) {
        return [NSNumber numberWithBool:false];
    }
    
    NSInteger midIndex = (left+right)/2;
    NSNumber* mid = array[midIndex];
    
    if (number.floatValue > mid.floatValue) { // 對切的右邊
        return [self binarySearchIndexInArray:array forNumber:number leftRange:midIndex+1 rightRange:right];
    }else if (number.floatValue < mid.floatValue){ // 對切的左邊
        return [self binarySearchIndexInArray:array forNumber:number leftRange:left rightRange:midIndex-1];
    }else{ // equal,找到了
        return  [NSNumber numberWithInteger:midIndex];
    }
}

關於搜尋

這個搜尋法的前提是你的數列要幾經排序好了。這個前置條件才讓我發現我之前一直以為搜尋是有什麼神奇的方法,能夠在一個大數列裡面找到target的位置,現在接觸演算法就理解現實運作方法是先排序之後再用方法搜尋的。

QuickSort與Obj-C

| Comments

Qucik Sort概念

第一次看到快速排序的許多介紹,可能第一時間腦袋轉不太過來,因為網路介紹常常把虛擬碼翻成步驟,直接敘述,所以腦袋普通像我就會沒辦法意會為什麼要做這個動作。比如後面會提到的In-Place版本交換這個動作就常常不知為何而做。這裡有個影片是從很高層次想法上去解釋Quick Sort,個人看了之後再想想虛擬碼,也就豁然開朗了。

Qucik Sort概念轉換成Code

1
2
3
4
5
6
7
8
9
10
11
12
13
14
15
16
17
18
19
20
21
22
23
24
25
26
27
- (NSArray *)quickSortUseExtraMemoryWithData:(NSArray *)data {

    if (data.count <= 1) { // 到底部了, 不需要排序, 直接回傳
        return data;
    }
    
    int random = arc4random() % data.count;  // 隨機取用某index當pivot,避免比如排序已經排好的陣列,每次都取index0,會造成時間複雜度O(N^2),worst case
    NSNumber *pivot = data[random];
    
    NSMutableArray *less = [[NSMutableArray alloc]init];
    NSMutableArray *greater = [[NSMutableArray alloc]init];
    
    for (int i=1; i<=data.count-1; i++ ) {
        if ([(NSNumber *)data[i]floatValue] >= [pivot floatValue]) {
            [greater addObject:data[i]];
        }else {
            [less addObject:data[i]];
        }
    }
    
    NSMutableArray *result = [[NSMutableArray alloc]init];
    [result addObjectsFromArray:[self quickSortUseExtraMemoryWithData:less]];
    [result addObject:pivot];
    [result addObjectsFromArray:[self quickSortUseExtraMemoryWithData:greater]];
    
    return result;
}

如果常寫有支援記憶體管理語言比如Java或ARC版Obj-C的人可能會直覺寫出這個版本,因為在這幾個語言裡其實常常不用太管記憶體使用量太多這個問題,除非是UIImage等大型物件沒有釋放,不然常常遇到比如NSArray分割其實也就是再開兩個NSArray去存就好了。

上面這個實作方法每次都新開NSArray去存放分割後的子Array,而Quick Sort比Merge Sort好的地方在於它可以改用稱作In-Place的方法,只在同一個陣列做交換,可以避免運用消耗多餘的記憶體空間,參考文獻也寫說實務上也可以增加演算法的效率。

Qucik Sort In-Place 版本

1
2
3
4
5
6
7
8
9
10
11
12
13
14
15
16
17
18
19
20
21
22
23
24
25
26
27
- (NSMutableArray *)quickSortInPlaceWithData:(NSMutableArray <NSNumber *>*)data leftIndex:(NSInteger)left rightIndex:(NSInteger)right{
    // 使用in-place法,操作同一個陣列,避免額外消耗多餘記憶體,硬體限制嚴格的環境下使用
    
    if (left > right) { // 底部。代表上一層遞迴切出來,這個sub-array已經只有一個元素,就不用排列了,'這個元素也會是已經就定位的'。
        return nil;
    }
    
    NSNumber *pivot = data[right];
    
    NSInteger processIndexAKAWall = left;
    [data exchangeObjectAtIndex:right withObjectAtIndex:right];// 把pivot移到最後面
    for (int i=(int)left; i<right; i++ ) { // left ... right-1
        if ([data[i]floatValue] < [pivot floatValue]) {
            [data exchangeObjectAtIndex:processIndexAKAWall withObjectAtIndex:i];// 擺到牆的右邊
            processIndexAKAWall = processIndexAKAWall + 1;// 牆往前
        }
    }
    [data exchangeObjectAtIndex:processIndexAKAWall withObjectAtIndex:right];// 把pivot移到牆的右邊。這個pivot目前已經在正確的index上了。
    
    // 切兩段
    // start by left, end by processIndexAKAWall - 1
    // start by processIndexAKAWall + 1, end by right
    [self quickSortInPlaceWithData:data leftIndex:left rightIndex:processIndexAKAWall - 1];
    [self quickSortInPlaceWithData:data leftIndex:processIndexAKAWall + 1 rightIndex:right];
    
    return data;
}

更好用的呼叫方式

平均空間複雜度更好的In-Place版本,因為只有NSMutableArray可以交換item,所以如果傳入值是是NSArray則呼叫的時候要寫成以下方式:

1
NSMutableArray *result = [self quickSortInPlaceWithData:[data mutableCopy] leftIndex:0 rightIndex:data.count-1];

而為了可以讓NSArray可以使用,也方便之後做成NSArrayCategory,就可以改寫成以下這種較為方便別人使用的方式,因為別人不一定知道Left與Right,也不需要懂實作細節情況下:

1
2
3
- (NSArray *)quickSort:(NSArray *)data {
    return [self quickSortInPlaceWithData:[data mutableCopy]  leftIndex:0 rightIndex:data.count-1];
}

MergeSort與Obj-C外加Category與OOP

| Comments

Merge Sort概念

跟我一樣原本不知道Merge Sort是什麼碗糕的可以去這個影片,這裡有可愛北一女的實際示範,中文的呦。如果英文好那我也是更推薦去看英文的,那資源又更多了。

Merge Sort概念轉換成Code

在懂了Merge Sort概念之後,如果對於如何把想法轉換成程式碼沒什麼感覺,可以看一段影片,這段影片大概就是程式碼影片化後實際運作的樣子。

Merge Sort有分Recursive跟For loop兩種,但看完影片直覺就是用Recursive比較好做。這是因為你看Merge Sort其實是把一個大問題分成小問題,小問題再分成更小的問題,直到把問題切割成最小單元,再返回來把前一次的結果餵給上一層,之後一層一層的解回去。這是很典型的遞迴場景。 NSMutableArray 上面的問題解決思路在演算法裡面叫做Divide and Conquer,蠻傳神的解釋,把問題分解後在各個擊破。

Objective-c Implement

  • Input為一個NSArray,裡面包含N個NSNumber,NSNumber可以為Int或Flot。
  • Output為一個把Input Array裡面的N個NSNumber由小排序到大的NSArray。
1
2
3
4
5
6
7
8
9
10
11
12
13
14
15
16
17
18
19
20
21
22
23
24
25
26
27
28
29
30
31
32
33
34
35
36
37
38
39
40
41
42
43
44
45
46
- (NSArray *)mergeSortWithData:(NSArray *)data {
    
    if (data.count == 1) {
        // div done here
        // 這裡已經把問題分解成最小單位了,所以就告一段落
        return data;
    }
    
    NSInteger divLength = data.count/2;
    NSArray *left = [data subarrayWithRange:NSMakeRange(0, divLength)];
    NSArray *rigth = [data subarrayWithRange:NSMakeRange(divLength, data.count-divLength)];
    
    NSArray<NSNumber*> *mergeArrayA = [self mergeSortWithData:left];
    NSArray<NSNumber*> *mergeArrayB = [self mergeSortWithData:rigth];
    
    NSInteger headOfMergeArrayA = 0;
    NSInteger headOfMergeArrayB = 0;
    
    NSMutableArray *resultArray = [[NSMutableArray alloc]initWithCapacity:mergeArrayA.count+mergeArrayB.count];
    
    Boolean control = true;
    while (control) {
        
        if (headOfMergeArrayA == mergeArrayA.count) {
            //MergeArrayA沒東西了
            //把剩餘的MergeArrayB直接append到resultArray後面
            [resultArray addObjectsFromArray:[mergeArrayB subarrayWithRange:NSMakeRange(headOfMergeArrayB, mergeArrayB.count-headOfMergeArrayB)]];
            control = false;
            break;
        }else if(headOfMergeArrayB == mergeArrayB.count){
            [resultArray addObjectsFromArray:[mergeArrayA subarrayWithRange:NSMakeRange(headOfMergeArrayA, mergeArrayA.count-headOfMergeArrayA)]];
            control = false;
            break;
        }
        
        if ([mergeArrayA[headOfMergeArrayA]floatValue] > [mergeArrayB[headOfMergeArrayB]floatValue]) {
            [resultArray addObject:mergeArrayB[headOfMergeArrayB]];
            headOfMergeArrayB = headOfMergeArrayB + 1;
        }else{
            [resultArray addObject:mergeArrayA[headOfMergeArrayA]];
            headOfMergeArrayA = headOfMergeArrayA + 1;
        }
    }
    
    return resultArray;
}

Do more – Free Function與Method

可以看到mergeSortWithData是一個Function,但我自己Obj-C軟體實作的Coding style上如果一個Function的Input有指定要是某個Class,比如這裡就是指定NSArray,那這時候採用Method較好。

但通常很少情況會不指定Input的Clsas,所以實務上會盡量少用Free Function,附帶的好處是可以減少一堆Function散落在專案裡面,也可以盡量DRY(Don’t repeat yourself)。

當然,不要過度強調DRY,因為這關係到切架構與抽象化整體的規劃能力,抽象的不好那是會用弄越糟的,但至少在這個簡單的Case裡Merge Sort做成Method絕對是make sense的。

這裡可以練習把Merge Sort用Category的方式做成NSArray的Method。基礎OOP,把一些地方改成Self就可以了。

In-App-Purchase交易模組設計

| Comments

網路上很多介紹如何運用StoreKit裡面的API在iOS上付款的文章,但實務上因為In-App-Purchase是程式裡面需要密集配合業務需求的部分,如果沒有一個良好抽象化的設計,在高可維護性與彈性,可擴展能力下功夫,一旦業務需求一複雜或反覆迭代更改,就會讓IAP相關的邏輯變得難以修改與維護。

以上原因,所以如何在APP中設計一套可維護可擴展易整合的IAP架構,是開發大型APP與進階開發者應該關心的議題。接下來的文章把IAP付款架構有關執行交易與交易結果處理的這部分,抽象成TNStoreObserver類別。

StoreObserver

付款流程是APP根據一組定義在iTunesConnect的商品ID,向Apple Server請求對應的SKPayment物件,裡面包含了Localization的商品名稱與價錢,把這個想成一個商品。而一旦把這個SKPayment物件放到由系統維護的SKPaymentQueue時,這時候就開始進入按指紋,輸入iTunes Store帳密的程序。

StoreKit說明,當SKPayment加入到SKPaymentQueue後,開發者需要實作一個adoptSKPaymentTransactionObserverprotocol的物件,並加入到SKPaymentQueue裡。之後這個Observer就是負責處理各種交易結果。比如成功時就要開啟對應的功能等。

所以這個Class就取名叫StoreObserver,職責是實作SKPaymentTransactionObserverprotocol,處理交易完成的後續行為。並負責與SKPaymentQueue互動,比如購買,取回過去的購買紀錄。最後可方便的在任何地方發動購買,然後在需要的地方容易接收到結果。

基於以上需求,開去構思這個模組。

先處理交易的部分,這就是單純與StoreKit串接。以下兩個Public方法:

1
2
3
4
5
6
7
8
9
10
11
12
13
// 購買SKProduct
// Create and add a payment request to the payment queue
-(void)buy:(SKProduct *)product
{
    SKMutablePayment *payment = [SKMutablePayment paymentWithProduct:product];
  [[SKPaymentQueue defaultQueue] addPayment:payment];
}

// 取回過去完成交易的非消耗品購買與自動續訂紀錄
-(void)restore
{
    [[SKPaymentQueue defaultQueue] restoreCompletedTransactions];
}

實作上會把這個StoreObserver做成Singleton,因為APP裡面可能會有許多頁面允許付款,只要[[StoreObserver sharedInstance] buy:product];就可以購買商品。然後因應上面的restore方法,這裡需要一個NSArray來裝取回的商品們,命名為productsRestored

1
2
3
4
5
6
7
8
9
10
11
12
13
14
15
16
17
18
19
20
21
+ (StoreObserver *)sharedInstance
{
    static dispatch_once_t onceToken;
    static StoreObserver * storeObserverSharedInstance;
    
    dispatch_once(&onceToken, ^{
        storeObserverSharedInstance = [[StoreObserver alloc] init];
    });
    return storeObserverSharedInstance;
}


- (instancetype)init
{
  self = [super init];
  if (self != nil)
    {
        _productsRestored = [[NSMutableArray alloc] initWithCapacity:0];
    }
  return self;
}

這邊重要的來了,如果程式的某個地方呼叫了StoreObserverbuy發法,之後StoreObserver收到交易完成的資訊,而APP裡面可能會有很多地方因為這個交易而產生UI上的變化,比如買了一部影片,影片要開始播放,影片櫃需要新增新影片,會員的購買紀律需要增加一筆。該怎麼通知那麼多地方?這裡用了NSNotificationCenter

為什麼呢?因為在上述一對多的狀況下,StoreObserver會被設計成它不關心那些畫面或地方需要這些訊息。但它會把資料準備好,接著廣播。

當通知的人不關心他會通知到誰,但可能需要被通知的人很多時,NSNotificationCenter機制就派上用場了。

1
NSString * const TNIAPPurchaseNotification = @"TNIAPPurchaseNotification";

再來是讓接收廣播的地方容易做處理。在這個Class裡面我們設置三個Property,statusmessagepurchasedID。當這個Class實作SKPaymentTransactionObserver時,根據收到的資訊做整理,讓接收的人可以很方便利用交易結果。

1
2
3
4
5
6
7
8
9
10
11
typedef NS_ENUM(NSInteger, TNIAPPurchaseNotificationStatus)
{
    TNIAPPurchaseFailed, // Indicate that the purchase was unsuccessful
    TNIAPPurchaseSucceeded, // Indicate that the purchase was successful
    TNIAPRestoredFailed, // Indicate that restore products was unsuccessful
    TNIAPRestoredSucceeded // Indicate that restore products was successful
};

@property (nonatomic) TNIAPPurchaseNotificationStatus status;
@property (nonatomic, copy) NSString *purchasedID;
@property (nonatomic, copy) NSString *message;

比如當我們實作的SKPaymentTransactionObserver方法被SKPaymentQueue呼叫時,整理一下再POST Notification出去

1
2
3
4
5
6
7
8
9
10
// Called when an error occur while restoring purchases. Notify the user about the error.
- (void)paymentQueue:(SKPaymentQueue *)queue restoreCompletedTransactionsFailedWithError:(NSError *)error
{
    if (error.code != SKErrorPaymentCancelled)
    {
        self.status = IAPRestoredFailed;
        self.message = error.localizedDescription;
        [[NSNotificationCenter defaultCenter] postNotificationName:TNIAPPurchaseNotification object:self];
    }
}

實際運作

這邊我們不考慮要怎麼取得到SKPayment物件,因為這部分邏輯不在StoreObserver負責範圍內。

在任何地方容易的發動購買

1
2
3
SKProduct *product = (SKProduct *)productRequestResponse[indexPath.row];
        // Attempt to purchase the tapped product
        [[TNStoreObserver sharedInstance] buy:product];

在需要的地方容易收到並做處理

1
2
3
4
5
6
7
8
9
10
11
12
13
14
15
16
17
18
19
20
21
22
23
24
25
26
27
28
29
30
31
32
33
34
35
36
37
38
[[NSNotificationCenter defaultCenter] addObserver:self
                                             selector:@selector(handlePurchasesNotification:)
                                                 name:TNIAPPurchaseNotification
                                               object:[StoreObserver sharedInstance]];

// Update the UI according to the purchase request notification result
-(void)handlePurchasesNotification:(NSNotification *)notification
{
    StoreObserver *purchasesNotification = (StoreObserver *)notification.object;
    
    IAPPurchaseNotificationStatus status = (IAPPurchaseNotificationStatus)purchasesNotification.status;
    NSString *message = purchasesNotification.message;
    NSString *purchasedID = purchasesNotification.purchasedID;
   

  switch (status)
    {
        case IAPPurchaseFailed:
            //購買失敗...
          break;
            
        case IAPDownloadSucceeded:
        {
            //購買成功...
        }
          break;
        
        case IAPRestoredSucceeded:
        {
            //回復成功...
        }
            break;
            
        case IAPRestoredFailed:
            //回復失敗...
            break;
  } 
}

從零到穩固的基礎 - 談iOS刻畫UI

| Comments

MVVM是iOS開發近來熱門的開發架構,最近工作上不停用到這個架構去建立各種頁面,對於如何從零開始架構出一個方便開發與維護的MVVM架構有些實作上總結出的Tips或稱為想法在,這裡記錄下來與回顧。

系列第一篇會先從MVVM裡面的View開始講,通常這也是我開發的第一也是很重要的步驟,這裡一開始沒規劃好浪費的時間絕對是最多的,因為方向就錯了麻。

看UI圖然後先想想

第一步當然就是看著UI出好的圖,然後想想這個畫面上會用的什麼UIKit的控件。大部分不外乎是TableView, CollectionView, PageView,互相搭配即可組出框架。某些例外比如登入登出註冊頁面則通常就會一張空白View自己拉畫面,不太用到上面提到的控件。

真的有問題比如需要重新打造一個控件,或不好實作,卡到時間等,都在這裡即時反應給UI是最好的。不會先做下去遇到問題卡住再來溝通,這樣事倍功半真的也很浪費時間。

先大致上命名好

曾經有看過程式設計裡面在資深開發人員裡排名第一的難題是命名。這是因為如果一開始沒有想好階層式的命名方式,等到架構一大你就會開始需要在腦袋裡面Dump一堆記憶體來存這些Name的意義,久了也一定會忘記。

比如常見的新聞頁面

YahooNews

這個頁面大致需要下面幾個控件:

  1. 主要ViewController
  2. 一個CollectionView來當Indicator,顯示有那些類別
  3. 一個PageController來橫向翻頁在不同類別的新聞頁面
  4. 多個TableView拿來顯示新聞

那在命名上就要先大致想好:

  1. SHReaderViewController
  2. SHReaderCategoryIndicatorViewControllerSHReaderCategoryIndicatorCell
  3. SHReaderPageViewController
  4. SHReaderNewsViewControllerSHReaderNewsCell

只要名字的Prefix按照大方向一樣,階層想好定下來後,不管是要新增Coustom Class,或是要在Storyboard上標註對應的Storyboard Identifier都很方便,之後再開發與維護上會因為也脈絡可循的命名而容易許多。

多使用StackView

在iOS9加入StackView之後,整個畫面裡面Autolayout所需要的Constraints大幅的減少很多,事實上官方也建議最好Autolayout任何畫面可以考慮直接用StackView開始。

StackView的強項在於可以定義一個母區塊,讓裡面的SubView能Depend在母區塊的邊界上設定Constraints與做Autolayout,同時也限制這裡面的StackView裡的SubView改動不會影響到StackView之外的其他View

在沒有StackView之前只有一個RootView要給整個畫面上一堆SubView當做參照,這樣在設計Autolayout上往往牽一髮動全身,一個SubView的更改常常就會連帶影響一大推其他的View

用Storyboard Reference切割不同功能的畫面

比如Tabbar分出來的全部連到Storyboard Reference,或多次在不同地方會單獨M odel出來的畫面要拆分出來。這樣一個團隊才可以同時協作開發多個頁面,解決了Storyboard一開始被大家詬病的Git協作問題。

還有一些比較瑣碎的Tips

適時用Xib搭配Storyboard

當我們有時候要自製一個小控件比如Segment Control,裡面的Cell便可以用xib。掌握住initWithCoder用來再Storyboard載入,比如:

1
2
3
4
5
6
7
8
9
// If you are loading it from a nib file (or a storyboard), initWithCoder: will be used.
- (instancetype)initWithCoder:(NSCoder *)aDecoder
{
    self = [super initWithCoder:aDecoder];
    if (self) {
        [self addSubview:[[[NSBundle mainBundle] loadNibNamed:NSStringFromClass([self class]) owner:self options:nil] objectAtIndex:0]];
    }
    return self;
}

initWithFrame則是有時候不得已用Code的方式呼叫:

1
2
3
4
5
6
7
8
9
- (id)initWithFrame:(CGRect)frame
{
    self = [super initWithFrame:frame];
    if (self) {
        // Initialization code
        self.autoresizesSubviews = YES;
    }
    return self;
}

並且記得如果用Code呼叫要Frame,要在viewDidAppear這裡面做,因為根據ViewController這裡才是Frame經過Autolayout等計算後真正確定的地方。

利用SizeClass

比如轉向的需求,利用StoryboardSizeClass在不同情境下就可以很輕易漂亮的適配出你要的螢幕Layout,比如影片橫幅要佔滿全螢幕等。

Then…

其實在Xcode裡面刻畫環境真的是很享受的過程,當你刻畫出的UI在Storyboard上跟UI出的圖一樣時,那樣的成就感很高。尤其Apple近幾年推出的AutolayoutSizeClass其實都走在很前端的地方,給開發者很大的彈性與方便。

這裡也推薦這個網站Zeplin,我現在配合的設計師可以很方便地更新圖給大家,上面尺寸也都可以標註到很細,甚至這個網站還有Mac的APP,裡面有個特異功能是可以把素材匯進到專案的Assets.xcassets真的很棒!

運用iOS Fastlane自動化部署TestFlight

| Comments

老生常談得一件事情,如果一個團隊花一個禮拜的時間寫好自動部署的工具,比如用shell,把平常又臭又長或者很繁瑣的指令集結起來,之後這些繁瑣重複的工作就可以透過自動化工具省下不少時間。

表面上看起來或許一年之後你才能把省下來的那幾秒鐘累積成一個禮拜,達成回本的動作,但是如果你不這樣做,你把那一個禮拜的時間打散到一年裡面,換來的就是你一年的開發效率低落。

長遠看來,有沒有做自動化工具的團隊,差距可謂天與地。

知道了自動化的重要性,再來就iOS而言有一套國外Twitter青年才俊高富帥工程師從side project發展成全職開發的iOS自動化工具組-fastlane,國外紅一陣子了,但中文的介紹似乎不多,秉持人飢己飢的精神(?),也方便之後回顧,就來寫這篇吧。

首先我會先請你到官方文件那裡安裝必要的工具,之後我在介紹你tips,讓你可以快速達到自動部署上TestFlight的要求。 當然你之後可以串接Test的流程,確認沒問題了再上TestFlight。

首先到Fastlane的GitHub上依照最新的Installation章節安裝好Fastlane。接著依照Quick Start章節的步驟建好初步的文件。這中間可能會問你App ID啦,Apple ID的帳密呀,諸如此類的基礎設定。

接著看到目錄裡面的Fastfile文件,下面文件已經是我改好可以Run的版本,跟初始化的版本會不太一樣,更下面我會介紹是怎麼改過來的:

1
2
3
4
5
6
7
8
9
10
11
desc "Submit a new Beta Build to Apple TestFlight"
  desc "This will also make sure the profile is up to date"
  lane :beta do
    increment_build_number
    # match(type: "appstore") # more information: https://codesigning.guide
    gym(scheme: "SecureMedia", use_legacy_build_api: true) # Build your app - more options available
    pilot(team_name: "CUTE LIMITED")

    # sh "your_script.sh"
    # You can also use other beta testing services here (run `fastlane actions`)
  end

看到lane :beta do,代表之後我們只要下fastlane beta就可以指定執行一直到end包起來的這個區塊的動作。

我們先定義我們的beta要做什麼事情:
1. 把cocoapod裝一次
2. 把build號碼+1
3. 用Production的Provisioning Profiles,build一個ipa出來
4. 把這個版本送到TestFlight上,並送給tester

基本上如果上述都手動的話,大約要花上15分鐘左右(切換Provisioning Profiles, 上傳時間, 還有等iTunes connect處理新版build, 最後再手動送出分發測試版本到tester手上),透過自動化工具可以做到打一行指令後就可以不理了。

上述流程在Fastlane裡面被寫成三行,這三行的設定tips就分三項介紹

increment_build_number

Literally,increment_build_number就是自動增加build版號,別小看這個功能,以前常常是都發布出去了才發現沒有新增版號!需要配合設定Xcode參數Current Project Version。參照圖片或這邊

image

gym

這是幫我們產生ipa檔案的。後面跟上兩個參數scheme通常就是你得App名稱,use_legacy_build_api,則是因為Xcode 7.0的上傳API更改了,所以在使用時有時候會錯,這時候要改用舊的。

pilot

這是幫我們自動部署到TestFlight的,使用時需要加上team_name參數是因為筆者帳號下有兩個Team,你如果不填上這個Fastlane跑到一半就會問你,這樣自動化就沒意義了。

然後記得搭配pilot時,Xcode要配合在info.plist加上下面這個屬性:

1
2
<key>ITSAppUsesNonExemptEncryption</key>
<false/>

討論串是說iTunes connect建議手動上傳要使用這個參數。相關討論在這個issue頁。

後記

之後可以串接上Slack做完成時的顯示,再更進一步可以搭配Hubot,這樣連fastlane beta都省了。然後因為沒接觸CI Server,之後也可以研究兩者如何搭配。

其實筆者在用octopress發布文章的時候,明明指令沒幾行也硬是寫了三個shell來發布(new, preview, publish),但實在是幫我省了很多時間,不然每次我可都要去google指令,很煩的。

只能說工程師的懶沒有極限,但正是這種懶造就了人類文明的進步(?)。

有關製作iOS客製化Animation的詳細過程

| Comments

為何寫這篇

前幾篇有寫到如何製作SlideMenu,大概講了cocoa framework在客製化UIView動畫的世界觀,這裡則寫一個手把手的詳細步驟,這樣搭配比較有感覺,不然Apple把class之間解構的這麼徹底,實在是東一個西一個的,一時之間不好下手。

手把手開始

0.建segue並且設立id
1.segue kind選custom
2.建立subclass(UIStoryboardSegue)
3.override perform function

how to override perform function

1.取得self.sourceViewController
2.取得self.destinationViewController
3.set destVC 的setModalPresentationStyle = UIModalPresentationCustom//顯示面積客製化
4.誰提供客製化的資訊呢?在這裡! 建立一格subclass UIViewControllerTransitioningDelegate class(裡面怎麼實作請看段A)
5.set第四步的步驟為destVC的TransitioningDelegate
6.srcVC presentViewController destVC,動畫animated設置為YES

段A

hwo to create a subclass UIViewControllerTransitioningDelegate 的object。

這裡就是實作perform跟dismiss的時候動畫要怎麼走的地方,還有系統要UIPresentationController的地方,簡單來說就是系統從這邊獲取怎麼客製化顯示範圍與顯示動畫的資訊。

  • 1.提供override下面方法
1
2
3
4
5
6
7
8
- (UIPresentationController *)presentationControllerForPresentedViewController:(UIViewController *)presented presentingViewController:(UIViewController *)presenting sourceViewController:(UIViewController *)source{

1.透過if ([presented isKindOfClass:AlbumMenuViewController class])來分別要提供對應PresentationController{
2.建立一個subclass UIPresentationController的class。(怎麼建請看段B)
3.透過UIPresentationController的父方法initWithPresentedViewController...(略)去instance這個PresentationController object。
}

}
  • 2.override下面方法來提供prestedVC顯示時的動畫物件animator(從哪裡移動到哪裡,所以其實最後prestedVC的x,y是由這裡提供的動畫物件決定)
1
2
3
4
5
6
7
8
9
- (id<UIViewControllerAnimatedTransitioning> _Nullable)animationControllerForPresentedController:(UIViewController * _Nonnull)presented presentingController:(UIViewController * _Nonnull)presenting sourceController:(UIViewController * _Nonnull)source{

1.用if去知道你等等要回傳那個對應的animator
if([presented isKindOfClass:[HelperTableViewController class]]){
2.SlideMenuAnimator *animator = [[SlideMenuAnimator alloc]init];//製作一個實作UIViewControllerAnimatedTransitioning協議的animator class,怎麼做看段C
3.[animator setPresenting:YES];// 我設計的animator可以同時包含出場與離場的動畫,這樣就不用寫兩個animator了,所以裡面有個參數可以選擇要回傳哪種動畫,這裡是出場就設定YES。
}

}
  • 3.override下面方法來提供prestedVC dismiss時的動畫,功能如上,決定哪裡到哪裡
1
2
3
4
5
6
7
- (id<UIViewControllerAnimatedTransitioning> _Nullable)animationControllerForDismissedController:(UIViewController * _Nonnull)dismissed{
1.用if去知道你等等要回傳那個對應的animator
if([presented isKindOfClass:[HelperTableViewController class]]){
2.SlideMenuAnimator *animator = [[SlideMenuAnimator alloc]init];//前面解釋過
3.[animator setPresenting:NO];//前面解釋過
}
}

段B

  • 1.override – frameOfPresentedViewInContainerView這個方法來指定prestenVC要顯示的”大小”,注意不包含位置(x,y)喔
1
2
3
4
5
6
7
8
9
10
11
12
13
14
15
16
(CGRect)frameOfPresentedViewInContainerView
{
CGRect presentedViewFrame = CGRectZero;//我們要回傳的數值
CGRect containerBounds = [[self containerView] bounds];//得到prestingVC的bounds
// 到這裡你已經可以運加減乘除算出你要顯示的VC的大小,下面示範的是要根據ipad跟iphone做特別處理的做法

if (self.traitCollection.userInterfaceIdiom == UIUserInterfaceIdiomPhone) {
presentedViewFrame.size = CGSizeMake(floorf(containerBounds.size.width * 0.75),
containerBounds.size.height);
}else if(self.traitCollection.userInterfaceIdiom == UIUserInterfaceIdiomPad){
presentedViewFrame.size = CGSizeMake(floorf(300),
containerBounds.size.height);
}

return presentedViewFrame;//最後當然是回傳
}

補充:
除了override上面的方法去指定顯示大小外,你還可以override一些方法動態的去新增或拿掉view,比如切換VC時,prested如果沒有蓋滿presting,則剩下的地方可以放上一層黑色半透明的view來做區別。
下面是範例:

  • 2.新增property @property (nonatomic) UIView *dimmingView;
  • 3.複寫下面兩個方法,一個是當要切換時做什麼,另一個是當要隱藏時做什麼。搭配起來就可以動態新增刪除陰影view
1
2
3
4
5
6
7
8
9
10
11
12
13
14
15
16
17
18
19
20
21
22
23
24
25
26
27
28
- (void)presentationTransitionWillBegin {

self.dimmingView = [[UIView alloc]init];
[self.dimmingView setFrame:self.containerView.frame];
[self.dimmingView setBackgroundColor:[UIColor blackColor]];
[self.dimmingView setAlpha:0.3f];

// Add a custom dimming view behind the presented view controller's view
[[self containerView] addSubview:self.dimmingView];
[self.dimmingView addSubview:[[self presentedViewController] view]];

#pragma clang diagnostic push
#pragma clang diagnostic ignored "-Wundeclared-selector"
UITapGestureRecognizer *dimmingViewSingleTap =
[[UITapGestureRecognizer alloc] initWithTarget:self.presentingViewController
action:@selector(handleDimmingViewSingleTap)];
#pragma clang diagnostic pop
[self.dimmingView addGestureRecognizer:dimmingViewSingleTap];

// Fade in the dimming view during the transition.
[self.dimmingView setAlpha:0.0];
// Use the transition coordinator to set up the animations.
[[[self presentingViewController] transitionCoordinator] animateAlongsideTransition:^(id<UIViewControllerTransitionCoordinatorContext>  _Nonnull context) {
[self.dimmingView setAlpha:0.55];
} completion:^(id<UIViewControllerTransitionCoordinatorContext>  _Nonnull context) {

}];
}

在dismiss做一些額外coustom的事情,在這裡用讓dimmingView淡出來當例子

1
2
3
4
5
6
7
- (void)dismissalTransitionWillBegin {
[[[self presentingViewController] transitionCoordinator] animateAlongsideTransition:^(id<UIViewControllerTransitionCoordinatorContext>  _Nonnull context) {
[self.dimmingView setAlpha:0.0];
} completion:^(id<UIViewControllerTransitionCoordinatorContext>  _Nonnull context) {

}];
}

段C

  • 4.override下面方法,可以拿來改變一些基於class size變化的改變。
1
2
3
4
5
6
7
8
9
10
11
12
13
14
15
16
17
18
19
20
21
22
23
24
25
26
27
28
29
30
31
32
33
34
35
36
37
38
39
40
41
42
43
44
45
46
47
48
49
50
51
52
- (void)viewWillTransitionToSize:(CGSize)size withTransitionCoordinator:(id<UIViewControllerTransitionCoordinator>)coordinator 

//製作實作UIViewControllerAnimatedTransitioning協議的animator,系統會去這裡要VC的初始位置跟Final位置,系統再去補齊動畫。
//1 override 下面function來提供動畫內容(兩個位置)
- (void)animateTransition:(id<UIViewControllerContextTransitioning> _Nonnull)transitionContext {
1.// 主畫布
UIView *containerView = [transitionContext containerView];

2.// 對進場來說(toVC是prestedVC),拿到後可以再去拿VC的view
UIViewController *toVC   = [transitionContext
viewControllerForKey:UITransitionContextToViewControllerKey];

3.// 對進場來說(fromVC是prestingVC),拿到後可以再去拿VC的view
UIViewController *fromVC = [transitionContext
viewControllerForKey:UITransitionContextFromViewControllerKey];

4.//取得view,後面動畫主要就是都在操作這裡
UIView *toView = [transitionContext viewForKey:UITransitionContextToViewKey];
UIView *fromView = [transitionContext viewForKey:UITransitionContextFromViewKey];

5.//取得兩個VC的最終大小,大小是在frameOfPresentedViewInContainerView決定。
// Set up some variables for the animation.
CGRect containerFrame = containerView.frame;
CGRect toViewStartFrame = [transitionContext initialFrameForViewController:toVC];
CGRect fromViewStartFrame = [transitionContext initialFrameForViewController:fromVC];
CGRect toViewFinalFrame = [transitionContext finalFrameForViewController:toVC];
CGRect fromViewFinalFrame = [transitionContext finalFrameForViewController:fromVC];

6.// 開始作畫 Add toVC's view to containerView
// 把toView加進來
[containerView addSubview:toView];

7.//決定一開始的frame
if (self.presenting) {
//這邊直接用預設的
CGSize size = toViewFinalFrame.size;
[toView setFrame:CGRectMake(0, containerFrame.size.height+toViewFinalFrame.size.height, size.width, size.height)];//size一樣。x=0,y=總高度+toView的高
}

//決定最終的frame
if (self.presenting) {
[UIView animateWithDuration:[self transitionDuration:transitionContext] animations:^{
//大小一樣。位置就只要到x=0, y=總高度-toView高度
CGSize size = toViewFinalFrame.size;
CGPoint point = CGPointMake(0, containerFrame.size.height-toViewFinalFrame.size.height);
[toView setFrame:CGRectMake(point.x, point.y, size.width, size.height)];
}completion:^(BOOL finished) {
// 3.Cleaning up and completing the transition.
[transitionContext completeTransition:YES];
}];
}
}

5.override來提供動畫時間

1
2
3
- (NSTimeInterval)transitionDuration:(id<UIViewControllerContextTransitioning> _Nullable)transitionContext {
return 0.2f;
}

為什麼要當個CS工程師

| Comments

在電腦科學的領域裡面打滾這幾年發現一件事,當你能夠橫向操縱越多領域的工具,組合出來東西往往價值會更高。比如要組合一個APP開門鎖系統橫向需要連結PHP, Python, Objective-C, HTML約四種語言,其實每一種都不用太深入,但組合出來的系統往往一般人一時半刻不了解,需要問你是怎麼兜出來得。

這個發現在最近開發的新應用系統也得到驗證。其實可以這麼看,新的系統往往是由過往的工具所搭建出來,賦予新名稱,創造出新功能,如此而已。每個語言與工具有擅長的地方,拿上面提到的開鎖系統為例:

  1. Liunx+Apache+MySql+PHP+HTML = 家裡接收開鎖請求的Server
  2. Raspberry Pi + Python = 負責控制馬達開鎖的模組
  3. Objective-C = 當然就負責遠端送訊號,自動感應是不是快到家了
  4. ibeacon = 放在門附近負責讓手機知道自己快到家了

第一點其實資訊相關科技畢業基本一定要會,不然讀資訊科系真的是可惜。接下的幾點需要你能夠不怕生的上網找資料,並且學著去試試看。

何謂試試看?

打個比方,蜘蛛人一開始也不知道怎麼吐絲,所以他第一步不會直接把蜘蛛絲噴到摩天大樓,然後試著在大樓建拋來拋去。第一步當然是所謂的Hello, World。

幾乎每個工具或語言都有提供Quick start guide,你會找上這個工具就代表你應該有先上網Google過,發現這個工具可以幫你解決問題,而接下來就是照著文章去試試看。很多人不敢試是因為害怕失敗,但我想說得是每個看似風光厲害完成些什麼的工程師都是Error Message海裡面爬出來的。遇到錯誤訊息就去Google,就這麼簡單。想要什麼功能就把手弄髒去做就對了。

失敗到心寒

很多人其實卡死在這裡。前面說到Error的數量,確定程式設計師的力量,但要如何撐過Error海?這就要說到理想跟錢了。你為什麼選擇程式設計?

程式設計在可預見的30年內一定還會一直缺人,越缺越大而已,說直白的很混的可以就溫飽三餐小確幸,強的可以過得非常爽,而其他職業在未來只會被軟體吞掉而已。你選擇了這個看似高大上的行業,可以做的事情真的很多很多,幾乎是一個應許之地。你對前端沒興趣可以走後端,也可以轉資料庫,轉Hacker,轉Linux設定架設維護寫Shall…

做這個行業傲嬌的點應該在於對別人來說,你就像魔法師,有沒有用過星巴克QR Code掃一掃就可以付錢?Uber有搭乘過嗎?為什麼有人說Line不安全,那什麼是安全的軟體?在未來世界大家都離不開軟體,對一般人而已這一切都像是魔術,而程式設計可以了解背後資訊的流動,你可以解釋這一切magic一般的事情。強一點的之後你可以創造Magic,有這麼神奇的技能那有人願意付你錢真的是理所當然。

你要對自己身為魔術師感到驕傲,這幫助我在Error海裡面保持一顆赤子之心。

Be傲嬌

當你靠著自己得力量打造一個自豪的小系統,有人看到你的才能,你也相信自己的才能,自然而然你會得到錢,會得到自信,一切都像滾雪球一般停不下來。這個時代需要這樣的技能,選擇大於努力,跟對領域能事半功倍。

最後還是要補一句,學資訊系統的過程當然痛苦,但如果你物慾很強,夢想開拉風跑車,去普及島度假住水上小屋,還是一句話,你可以選擇繼續鬱卒,也可以選擇努力,花的力氣跟時間是一樣的,而程式設計這一條路可以是個方向。

iOS Camera Design Pattern 回顧

| Comments

主題:要刪除某張照片?

- Beat Practice 應該要由Model做發起去通知資料已變化。比如刪除照片: 
    1.  由某個UIButton觸發Model的Delete方法
    2.  Model做處理,處理完之後去通知相關連的ViewModel去更新(Notification)
    3.  ViewModel收到needUpdate通知,去Fetch並整理資料,最後通知View Reload

未完…

iOS 實作SlideMenu - 初探ViewController切換

| Comments

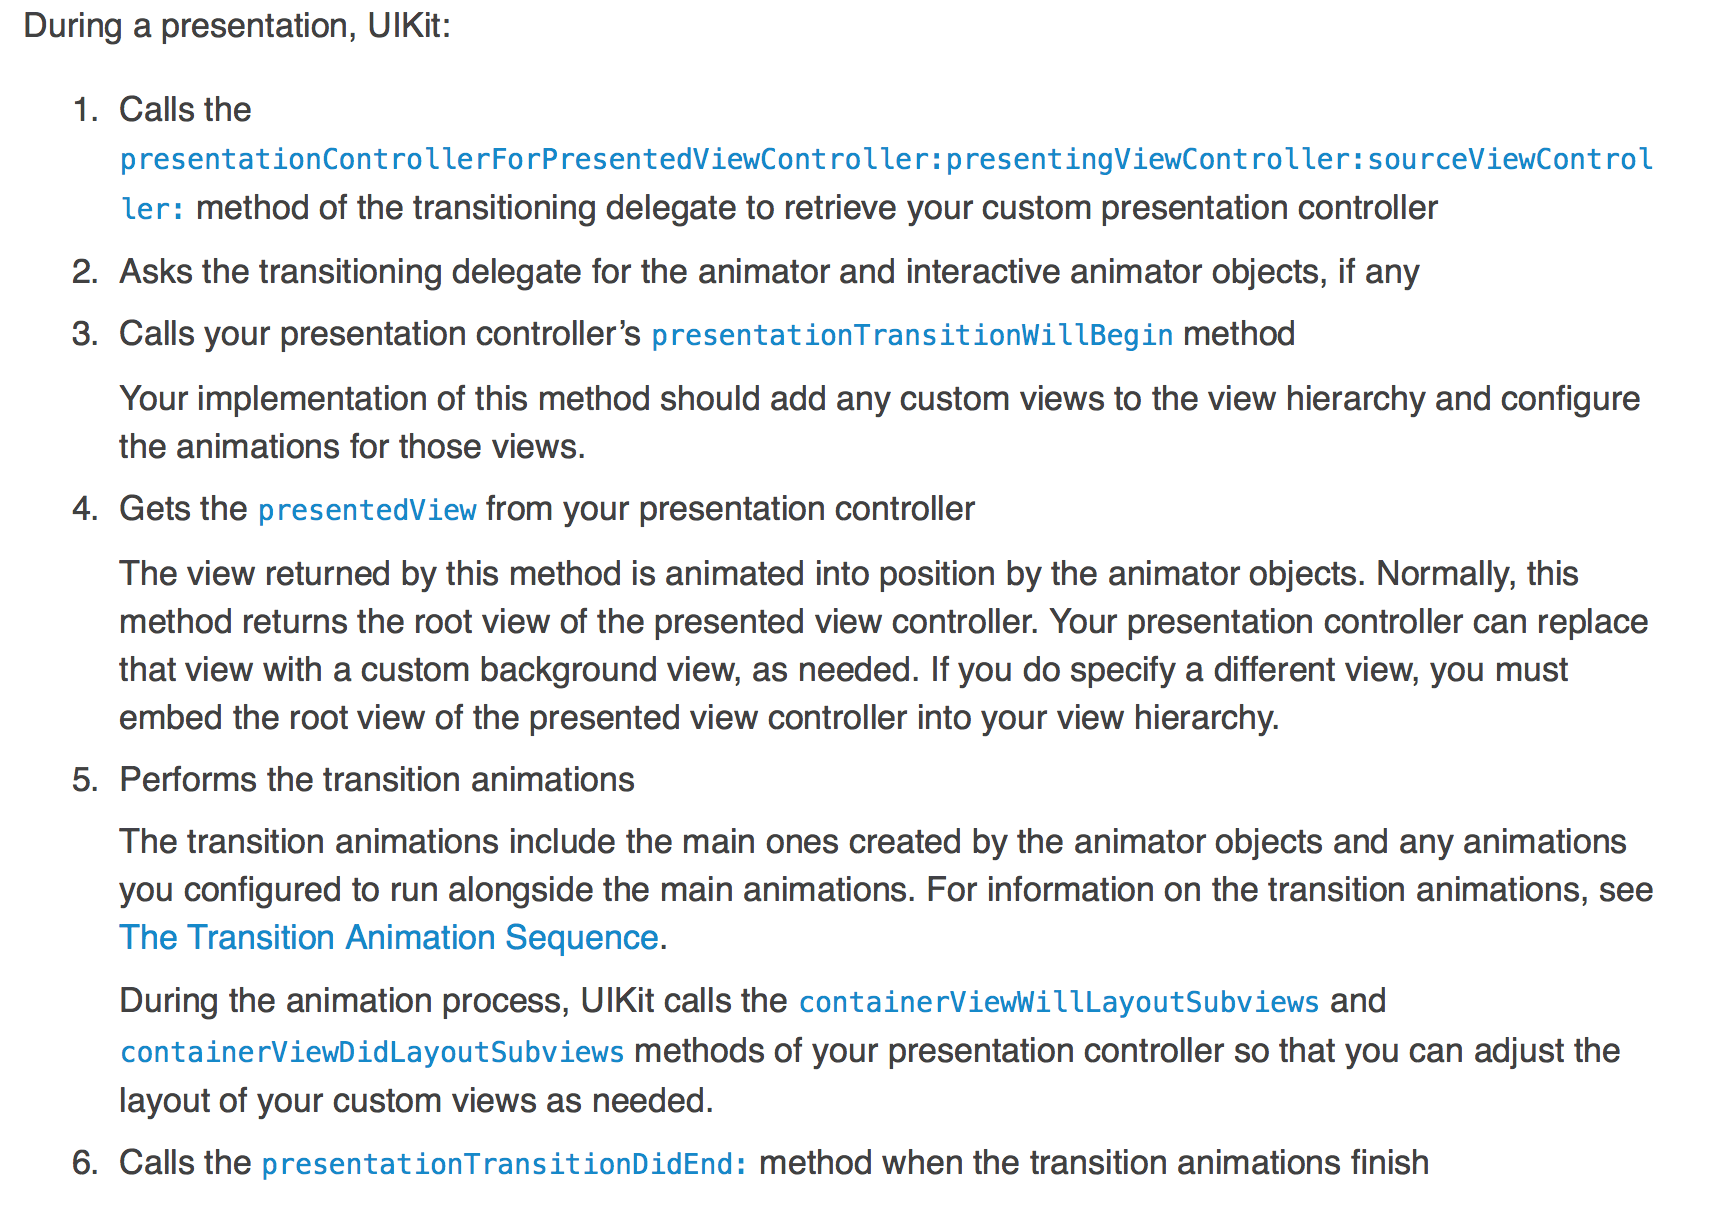
所有關於ViewController切換的行為基本稱做為Model,Navegation特有的Push等等也是Model的分支。 在iOS7裡面把制定切換ViewController的行為拆分成許多Class,目的是為了要降低耦合,讓Code重用度提高,比如Coustom一個切換Animation物件可以用在好幾個ViewController之間。

要切換ViewController你要告訴UIKit兩件事情,顯示成怎樣 UIModalPresentationStyle 和過場動畫Animations

UIModalPresentationStyle

UIModalPresentationStyleUIViewController裡的參數。定義了Presented最終呈現的樣式,比如:

  • 覆蓋全螢幕類的UIModalPresentationFullScreen
  • iPad上常見的UIModalPresentationPopover
  • UIModalPresentationCurrentContext指定特定ViewController去做覆蓋
  • 而我們想要的Slide Menu這樣的顯示效果不是上面幾種類型的,我們就必須要Coustom一個。也就必須實作TransitioningDelegate來提供下面兩種物件:
    • UIPresentationController
    • 實作UIViewControllerAnimatedTransitioning的Animation

兩個物件後面會提到怎麼產生。

使用Segue切換View Controller

用Code寫的話常見做法是在Prestenting View Controller裡面呼叫presentViewController。而在這個可視化當道的年代當然要配合Storyboard搭配Segue才不會在未來多螢幕適配被淘汰掉。

在StoryBoard裡面拉出一條Segue,並且把Kind指定成Coustom。這樣就是告訴StoryBoard我們不用UIKit內建的展示和轉場效果,要自己建立一個SubcalssUIStoryboardSegue的Coustom Segue物件:

1
@interface SlideLeftCustomSegue : UIStoryboardSegue

在這裡只要實作perform方法,在裡面設定:

1
2
3
4
5
6
7
8
9
10
11
12
13
14
15
16
17
18
// 系統調用prepareForSegue就是調用這裡
- (void)perform{

    UIViewController *srcViewController = (UIViewController *) self.sourceViewController;
    SettingTableViewController *destViewController = (SettingTableViewController *) self.destinationViewController;

    SlideMenuShowTransition *trainstionDelegate = [[SlideMenuShowTransition alloc]init];
    [destViewController setTd:trainstionDelegate];

  //Presented View Controller`ModalPresentationStyle屬性改成UIModalPresentationCustom
    [destViewController setModalPresentationStyle:UIModalPresentationCustom];
    
    //設置TransitioningDelegate。這個代理主要用來提供待會兒切換會用到的所有物件。下面會介紹到
    [destViewController setTransitioningDelegate:trainstionDelegate];
    
    //最後呼叫presentViewController,來呼叫UIKit做開始切換
    [srcViewController presentViewController:destViewController animated:YES completion:nil];
}

TransitioningDelegate

當系統發現Predented View Controller指定ModalPresentationStyle參數為UIModalPresentationCustom時,就會去呼叫TransitioningDelegate來提供上面有提到Model切換轉場所需的相關物件:UIPresentationController與Animation。

只要創一個實作TransitioningDelegate的NSObject,並指定給Presented View Controller就可以了。

執行的時候UIKit會先抓UIPresentaionController再依照情況抓取要的Animaion物件。

  1. 提交UIPresentaionController來決定Presented View的Final的Frame。
  2. 提交所有轉場,包誇Present View Controller進來, Dismiss View Controller,還有交互等等。我們這裡簡單討論Present還有Dismiss的Animation物件怎麼做。

系統會先抓UIPresentaionController一部分是因為Animation物件需要知道Prested View Final Frame。

1
2
3
4
5
6
7
8
9
10
11
12
13
14
15
16
17
18
19
20
21
22
23
24
25
// presentuikit會從這裡拿資料<過場動畫>
- (id<UIViewControllerAnimatedTransitioning> _Nullable)animationControllerForPresentedController:(UIViewController * _Nonnull)presented presentingController:(UIViewController * _Nonnull)presenting sourceController:(UIViewController * _Nonnull)source {
    SlideMenuAnimator *animator = [[SlideMenuAnimator alloc]init];
    [animator setPresenting:YES];
    return animator;
}

// dismissuikit會從這裡拿資料<過場動畫>
- (id<UIViewControllerAnimatedTransitioning> _Nullable)animationControllerForDismissedController:(UIViewController * _Nonnull)dismissed {
    SlideMenuAnimator *animator = [[SlideMenuAnimator alloc]init];
    [animator setPresenting:NO];
    return animator;
}

// UIKit在切換之初從這裡要UIPresentationController
- (UIPresentationController *)presentationControllerForPresentedViewController:
(UIViewController *)presented
                                                      presentingViewController:(UIViewController *)presenting
                                                          sourceViewController:(UIViewController *)source {

    SlideMenuPresentaionController* myPresentation = [[SlideMenuPresentaionController alloc]
                                                initWithPresentedViewController:presented presentingViewController:presenting];

    return myPresentation;
}

UIPresentationController

在iOS 7裡面引進了這個UIPresentationController,可以決定以下事情

  • Set the size of the presented view controller.
  • Add custom views to change the visual appearance of the presented content.
  • Supply transition animations for any of its custom views.
  • Adapt the visual appearance of the presentation when changes occur in the app’s environment.(之後另設補充)

這裡只先介紹前三項,指定Presented View Frame的方法,還有額外增加Coustom View如陰影層的方法:

1
2
3
4
5
6
7
8
9
10
11
12
13
14
15
16
17
18
19
20
21
22
23
24
25
26
27
28
29
30
31
32
33
34
35
36
37
38
39
40
41
42
43
44
45
46
47
48
// 決定了使用UIModalPresentationCustom這樣的Model切換方式,就可以在這裡直接指定PresentedViewframe
- (CGRect)frameOfPresentedViewInContainerView {
    CGRect presentedViewFrame = CGRectZero;
    CGRect containerBounds = [[self containerView] bounds];

    presentedViewFrame.size = CGSizeMake(floorf(containerBounds.size.width * 0.7),
                                         containerBounds.size.height);
    return presentedViewFrame;
}

// Present的時候可以增加一些Coustom View,靠animateAlongsideTransition來顯示新增的Coustom過場動畫
// 這裡用dimmingView來做Coustom View的例子
- (void)presentationTransitionWillBegin {

    self.dimmingView = [[UIView alloc]init];
    [self.dimmingView setFrame:self.containerView.frame];
    [self.dimmingView setBackgroundColor:[UIColor blackColor]];
    [self.dimmingView setAlpha:0.3f];

    // Add a custom dimming view behind the presented view controller's view
    [[self containerView] addSubview:self.dimmingView];
    [self.dimmingView addSubview:[[self presentedViewController] view]];

#pragma clang diagnostic push
#pragma clang diagnostic ignored "-Wundeclared-selector"
    UITapGestureRecognizer *dimmingViewSingleTap =
    [[UITapGestureRecognizer alloc] initWithTarget:self.presentingViewController
                                            action:@selector(handleDimmingViewSingleTap)];
#pragma clang diagnostic pop
    [self.dimmingView addGestureRecognizer:dimmingViewSingleTap];

    // Fade in the dimming view during the transition.
    [self.dimmingView setAlpha:0.0];
    // Use the transition coordinator to set up the animations.
    [[[self presentingViewController] transitionCoordinator] animateAlongsideTransition:^(id<UIViewControllerTransitionCoordinatorContext>  _Nonnull context) {
        [self.dimmingView setAlpha:0.55];
    } completion:^(id<UIViewControllerTransitionCoordinatorContext>  _Nonnull context) {

    }];
}

- (void)dismissalTransitionWillBegin {
    [[[self presentingViewController] transitionCoordinator] animateAlongsideTransition:^(id<UIViewControllerTransitionCoordinatorContext>  _Nonnull context) {
        [self.dimmingView setAlpha:0.0];
    } completion:^(id<UIViewControllerTransitionCoordinatorContext>  _Nonnull context) {

    }];
}

Animation

建立一個實作UIViewControllerAnimatedTransitioning protocol的NSObject,裡面會有系統傳入的UIViewControllerContextTransitioning,這裡面會包含你後面要做動畫所需的所有物件。

主要兩個方法,一個方法專門玩動畫,一個方法單純回傳動畫所需時間。

我們可以把Present和Dismiss的動畫寫在一起,但transitionContext傳入的資訊什麼都有,就是沒有現在是Present還是Dismiss狀態的參數。

所以要自己設一個,並且在TransitioningDelegate回傳動畫方法時指定給Animation物件知道:

1
2
3
@interface SlideMenuAnimator : NSObject<UIViewControllerAnimatedTransitioning>
@property (nonatomic) Boolean presenting;
@end
1
2
3
4
5
6
7
8
9
10
11
12
13
14
15
16
17
18
19
20
21
22
23
24
25
26
27
28
29
30
31
32
33
34
35
36
37
38
39
40
41
42
// 這裡UIKit會給我們兩個View,包在transitionContext裡面,只要取出來玩就好了
// 這裡是真的作動畫的地方
- (void)animateTransition:(id<UIViewControllerContextTransitioning> _Nonnull)transitionContext {

    // Get the set of relevant objects.
    UIView *containerView = [transitionContext containerView];
    UIViewController *fromVC = [transitionContext
                                viewControllerForKey:UITransitionContextFromViewControllerKey];
    UIViewController *toVC   = [transitionContext
                                viewControllerForKey:UITransitionContextToViewControllerKey];

    UIView *toView = [transitionContext viewForKey:UITransitionContextToViewKey];
    UIView *fromView = [transitionContext viewForKey:UITransitionContextFromViewKey];

    // Set up some variables for the animation.
    //CGRect containerFrame = containerView.frame;
    //CGRect toViewStartFrame = [transitionContext initialFrameForViewController:toVC];
    CGRect fromViewStartFrame = [transitionContext initialFrameForViewController:fromVC];
    CGRect toViewFinalFrame = [transitionContext finalFrameForViewController:toVC];
    CGRect fromViewFinalFrame = [transitionContext finalFrameForViewController:fromVC];

    // 3. Add toVC's view to containerView
    [containerView addSubview:toView];
    if (self.presenting) {
        [toView setFrame:CGRectOffset(toViewFinalFrame, -1*toViewFinalFrame.size.width, 0)];
    }else {
        [fromView setFrame:fromViewStartFrame];
    }

    // Creating the animations using Core Animation or UIView animation methods.
    [UIView animateWithDuration:[self transitionDuration:transitionContext] animations:^{
        if (self.presenting) {
            toView.frame = toViewFinalFrame;
        }else {
            fromView.frame = CGRectOffset(fromViewFinalFrame, -1*fromViewFinalFrame.size.width, 0);
        }
    } completion:^(BOOL finished) {
        // 3.Cleaning up and completing the transition.
        [transitionContext completeTransition:YES];
    }];

}

嚴謹有序的切換View Controller Flow

到這邊就可以做出一個會動,有PresentingView有陰影Mask的SlideMenu了,視覺上是仿照Google Photo。基本上iOS 7所引進的這些許多新方法都是為了要解構,使之可以更容易管理,更有邏輯性。

有關切換ViewController來有些重要Feature,留待之後想到應用實作再增加

  • InteractiveTransition交互動畫的部分
  • UIPresentationController適配不同場景的應用Adapting to Different Size Classes

參考資料

https://developer.apple.com/videos/play/wwdc2014-228/http://onevcat.com/2013/10/vc-transition-in-ios7/https://developer.apple.com/library/ios/featuredarticles/ViewControllerPGforiPhoneOS/DefiningCustomPresentations.html#//apple_ref/doc/uid/TP40007457-CH25-SW1